
:: Here’s what you’ll need::
Pattern (found below or use your own)
Transparency
X-Acto Knife
Self healing mat or cardboard
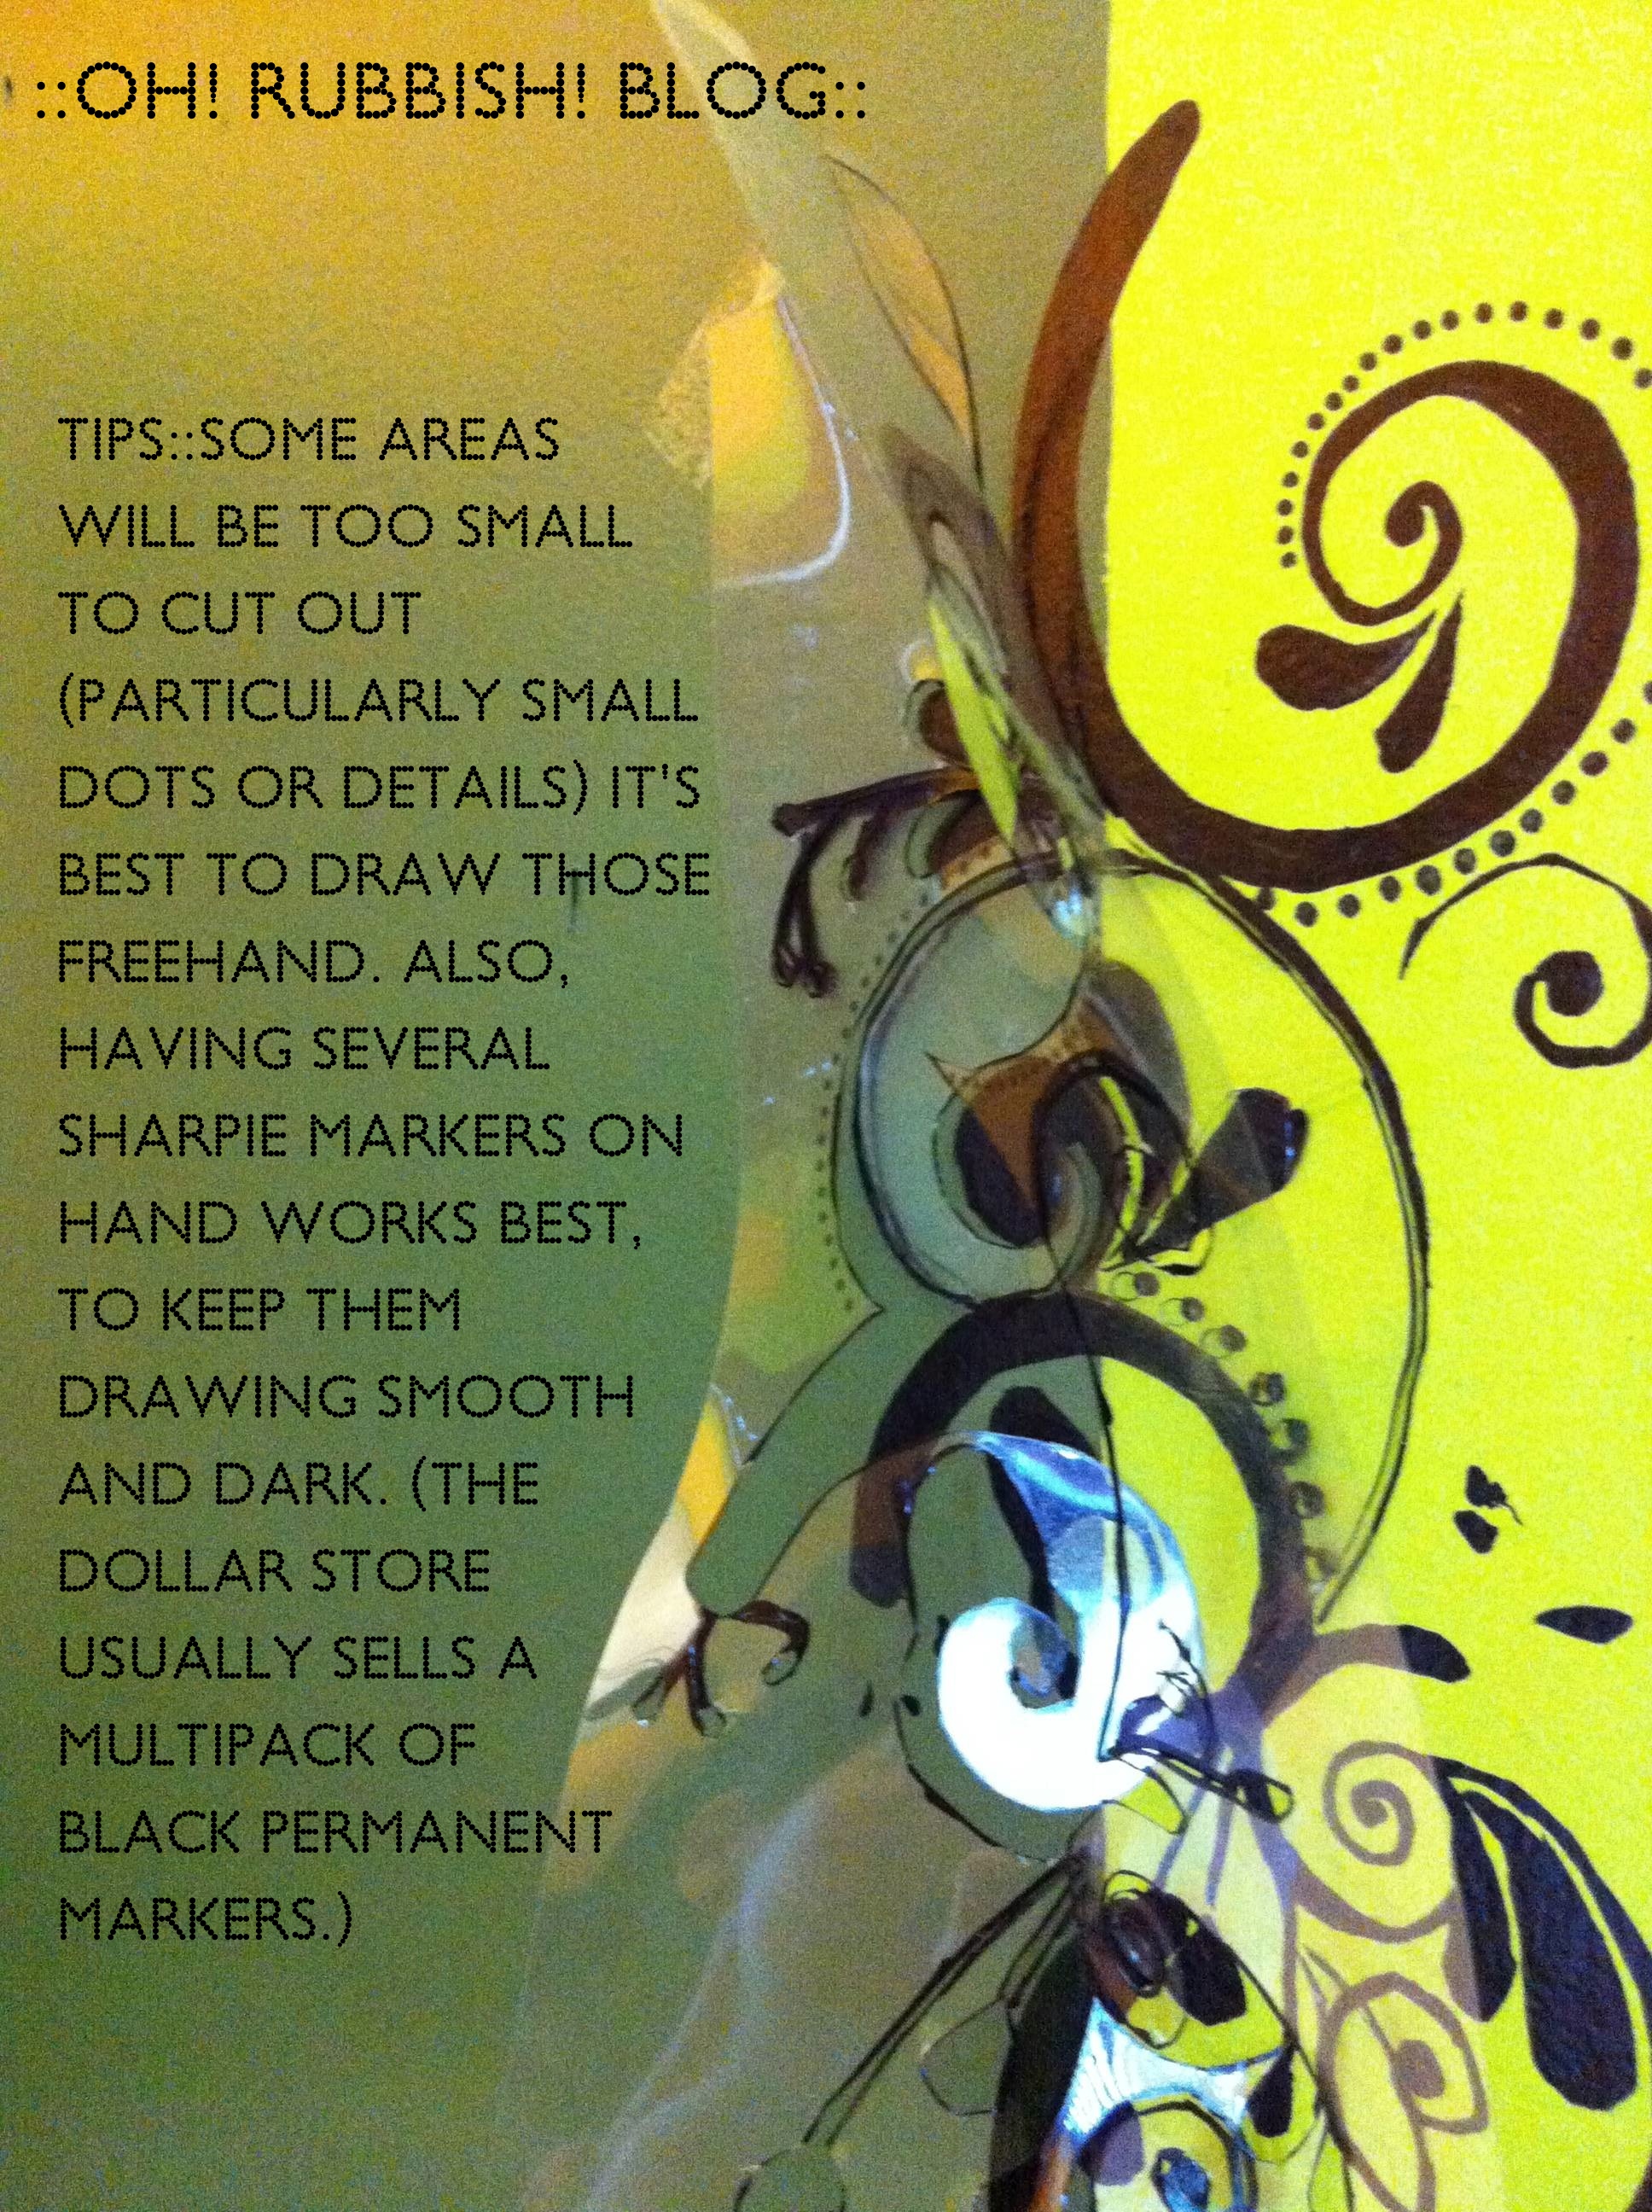
3 or more black permanent markers
Tape
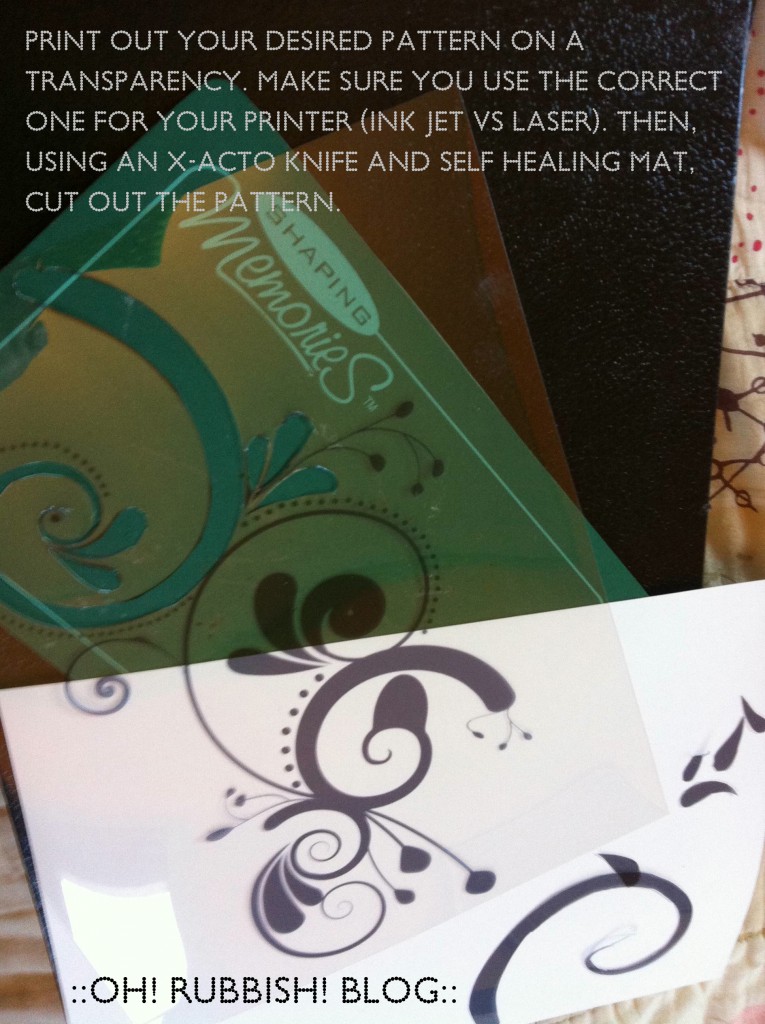 Print out your desired pattern on a transparency. Make sure you use the correct one for your printer (ink jet vs. laser). Then, using an X-acto knife and self healing mat (or cardboard), cut out the pattern.
:: Here is the pattern I used ::

TIPS:: Some areas will be too small to cut out (particularly small dots or details). It’s best to draw those freehand. Also, having several permanent markers on hand works best, to keep them drawing smooth and dark.
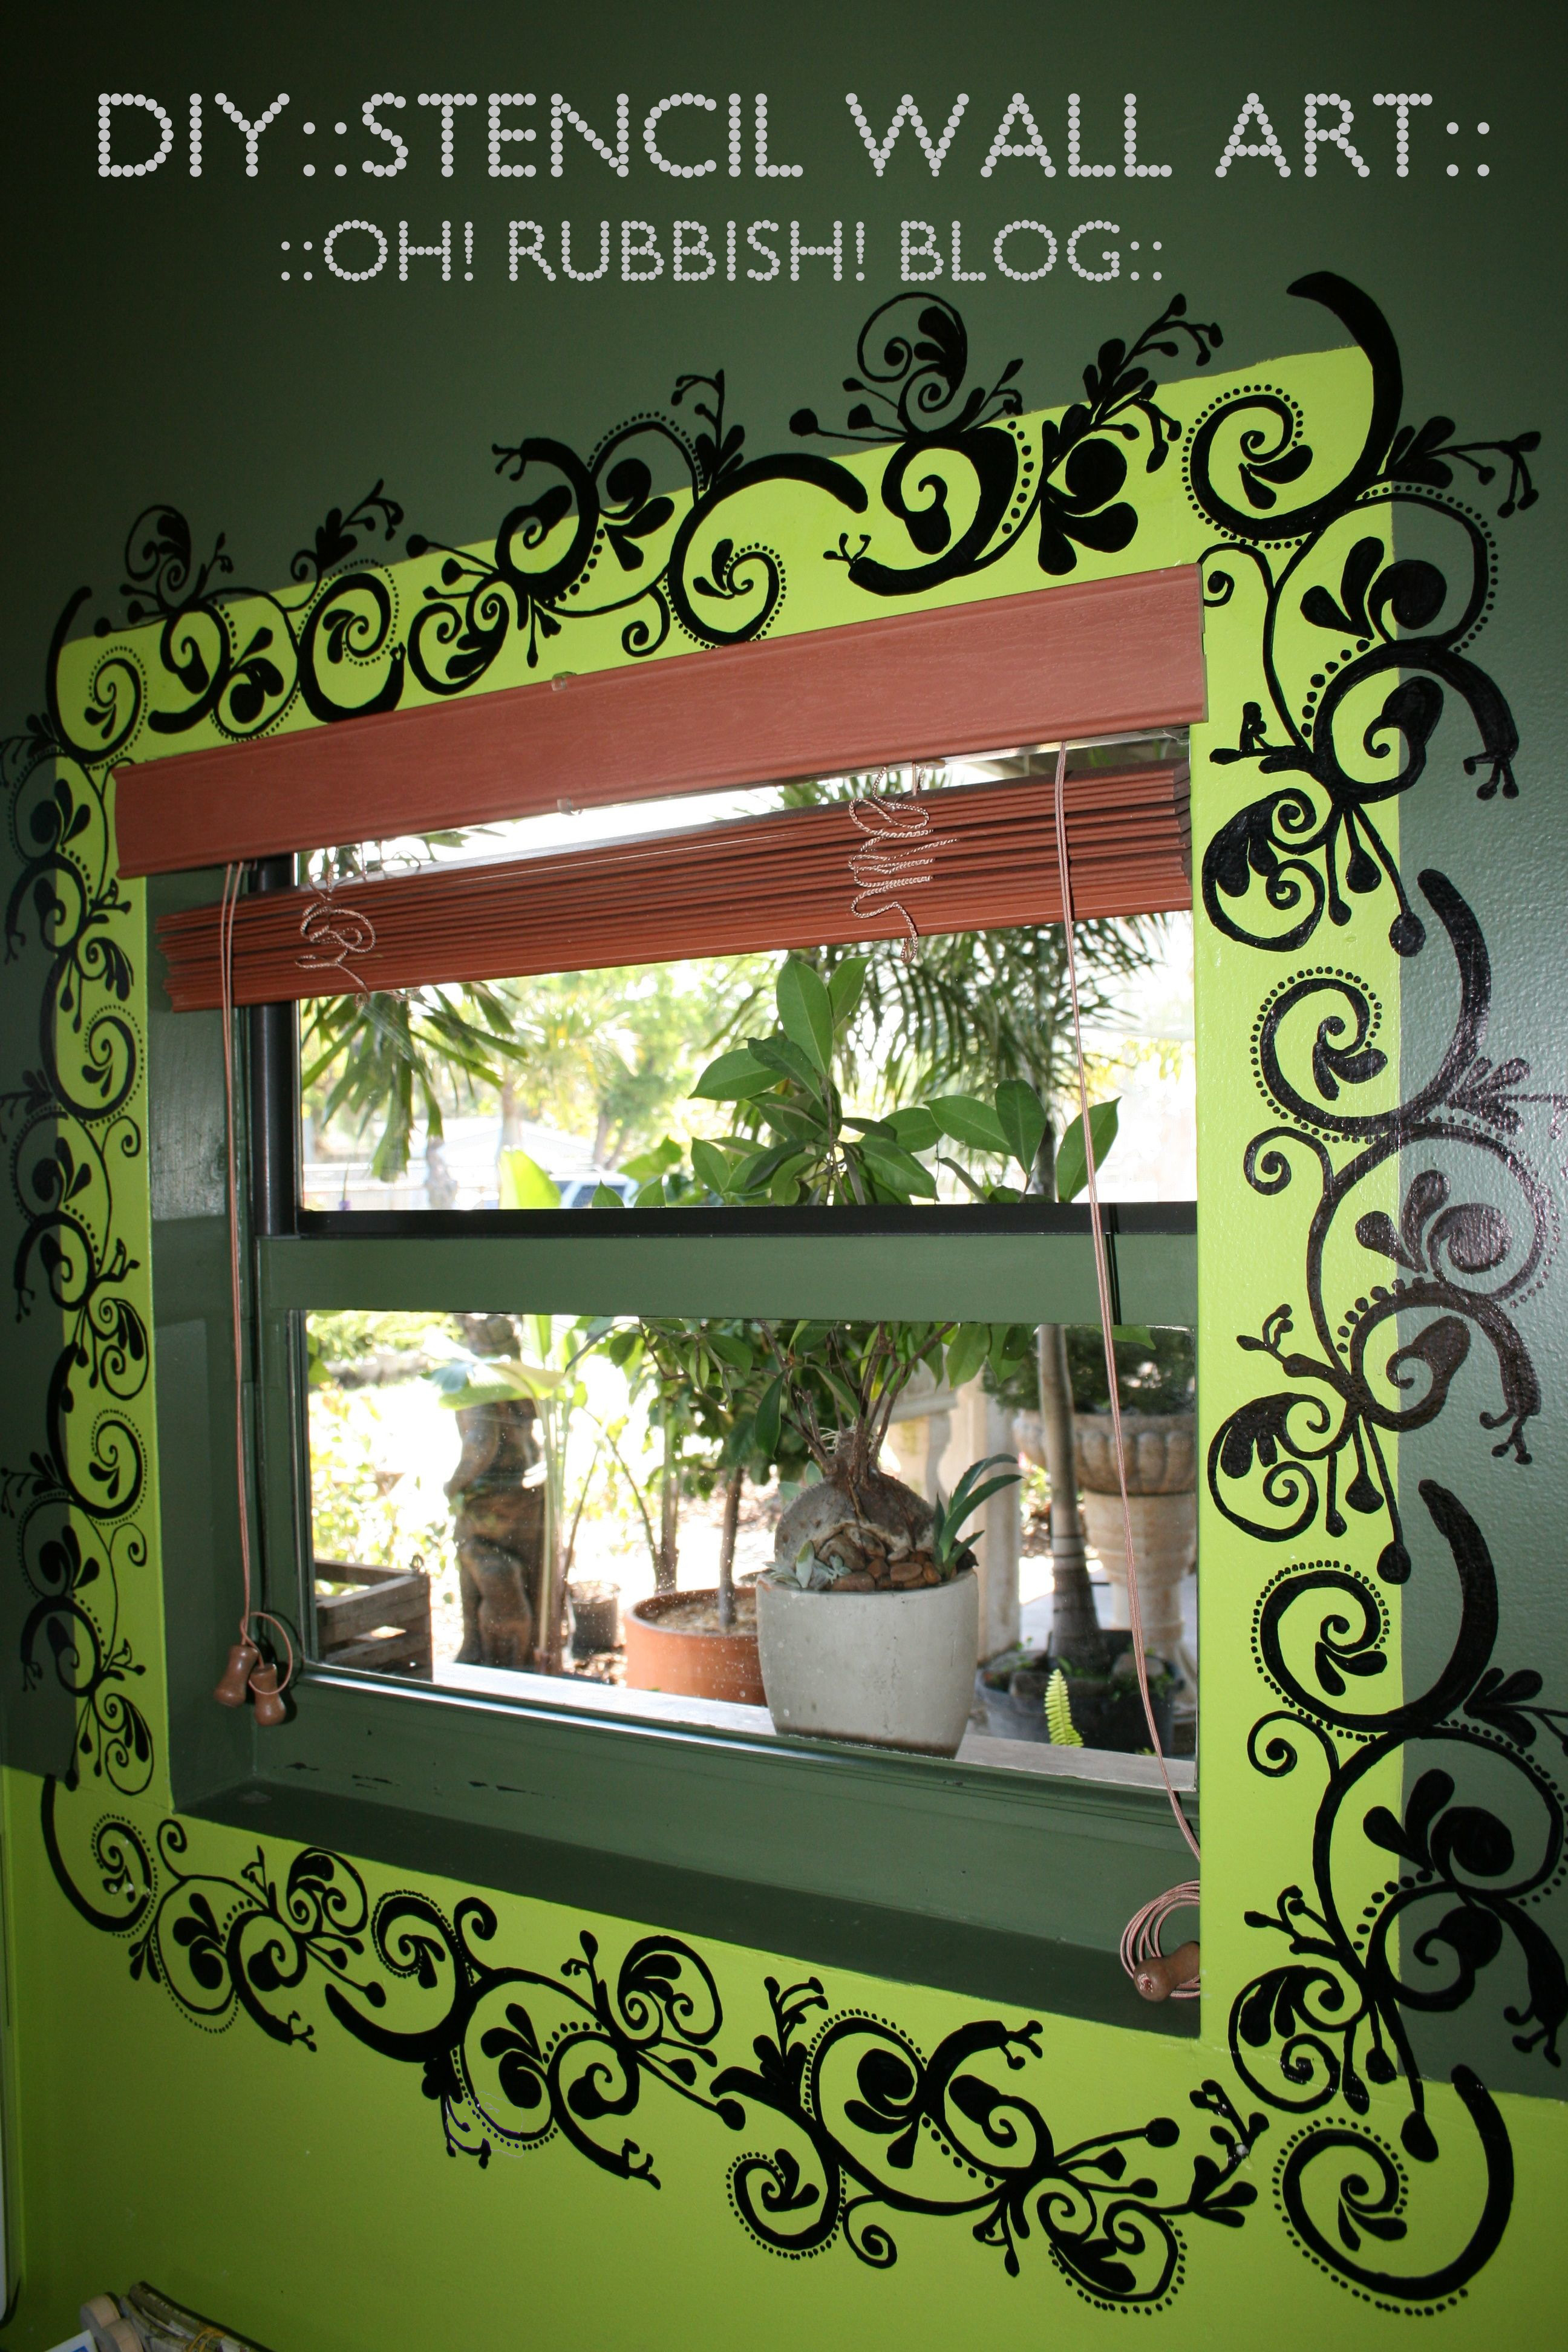
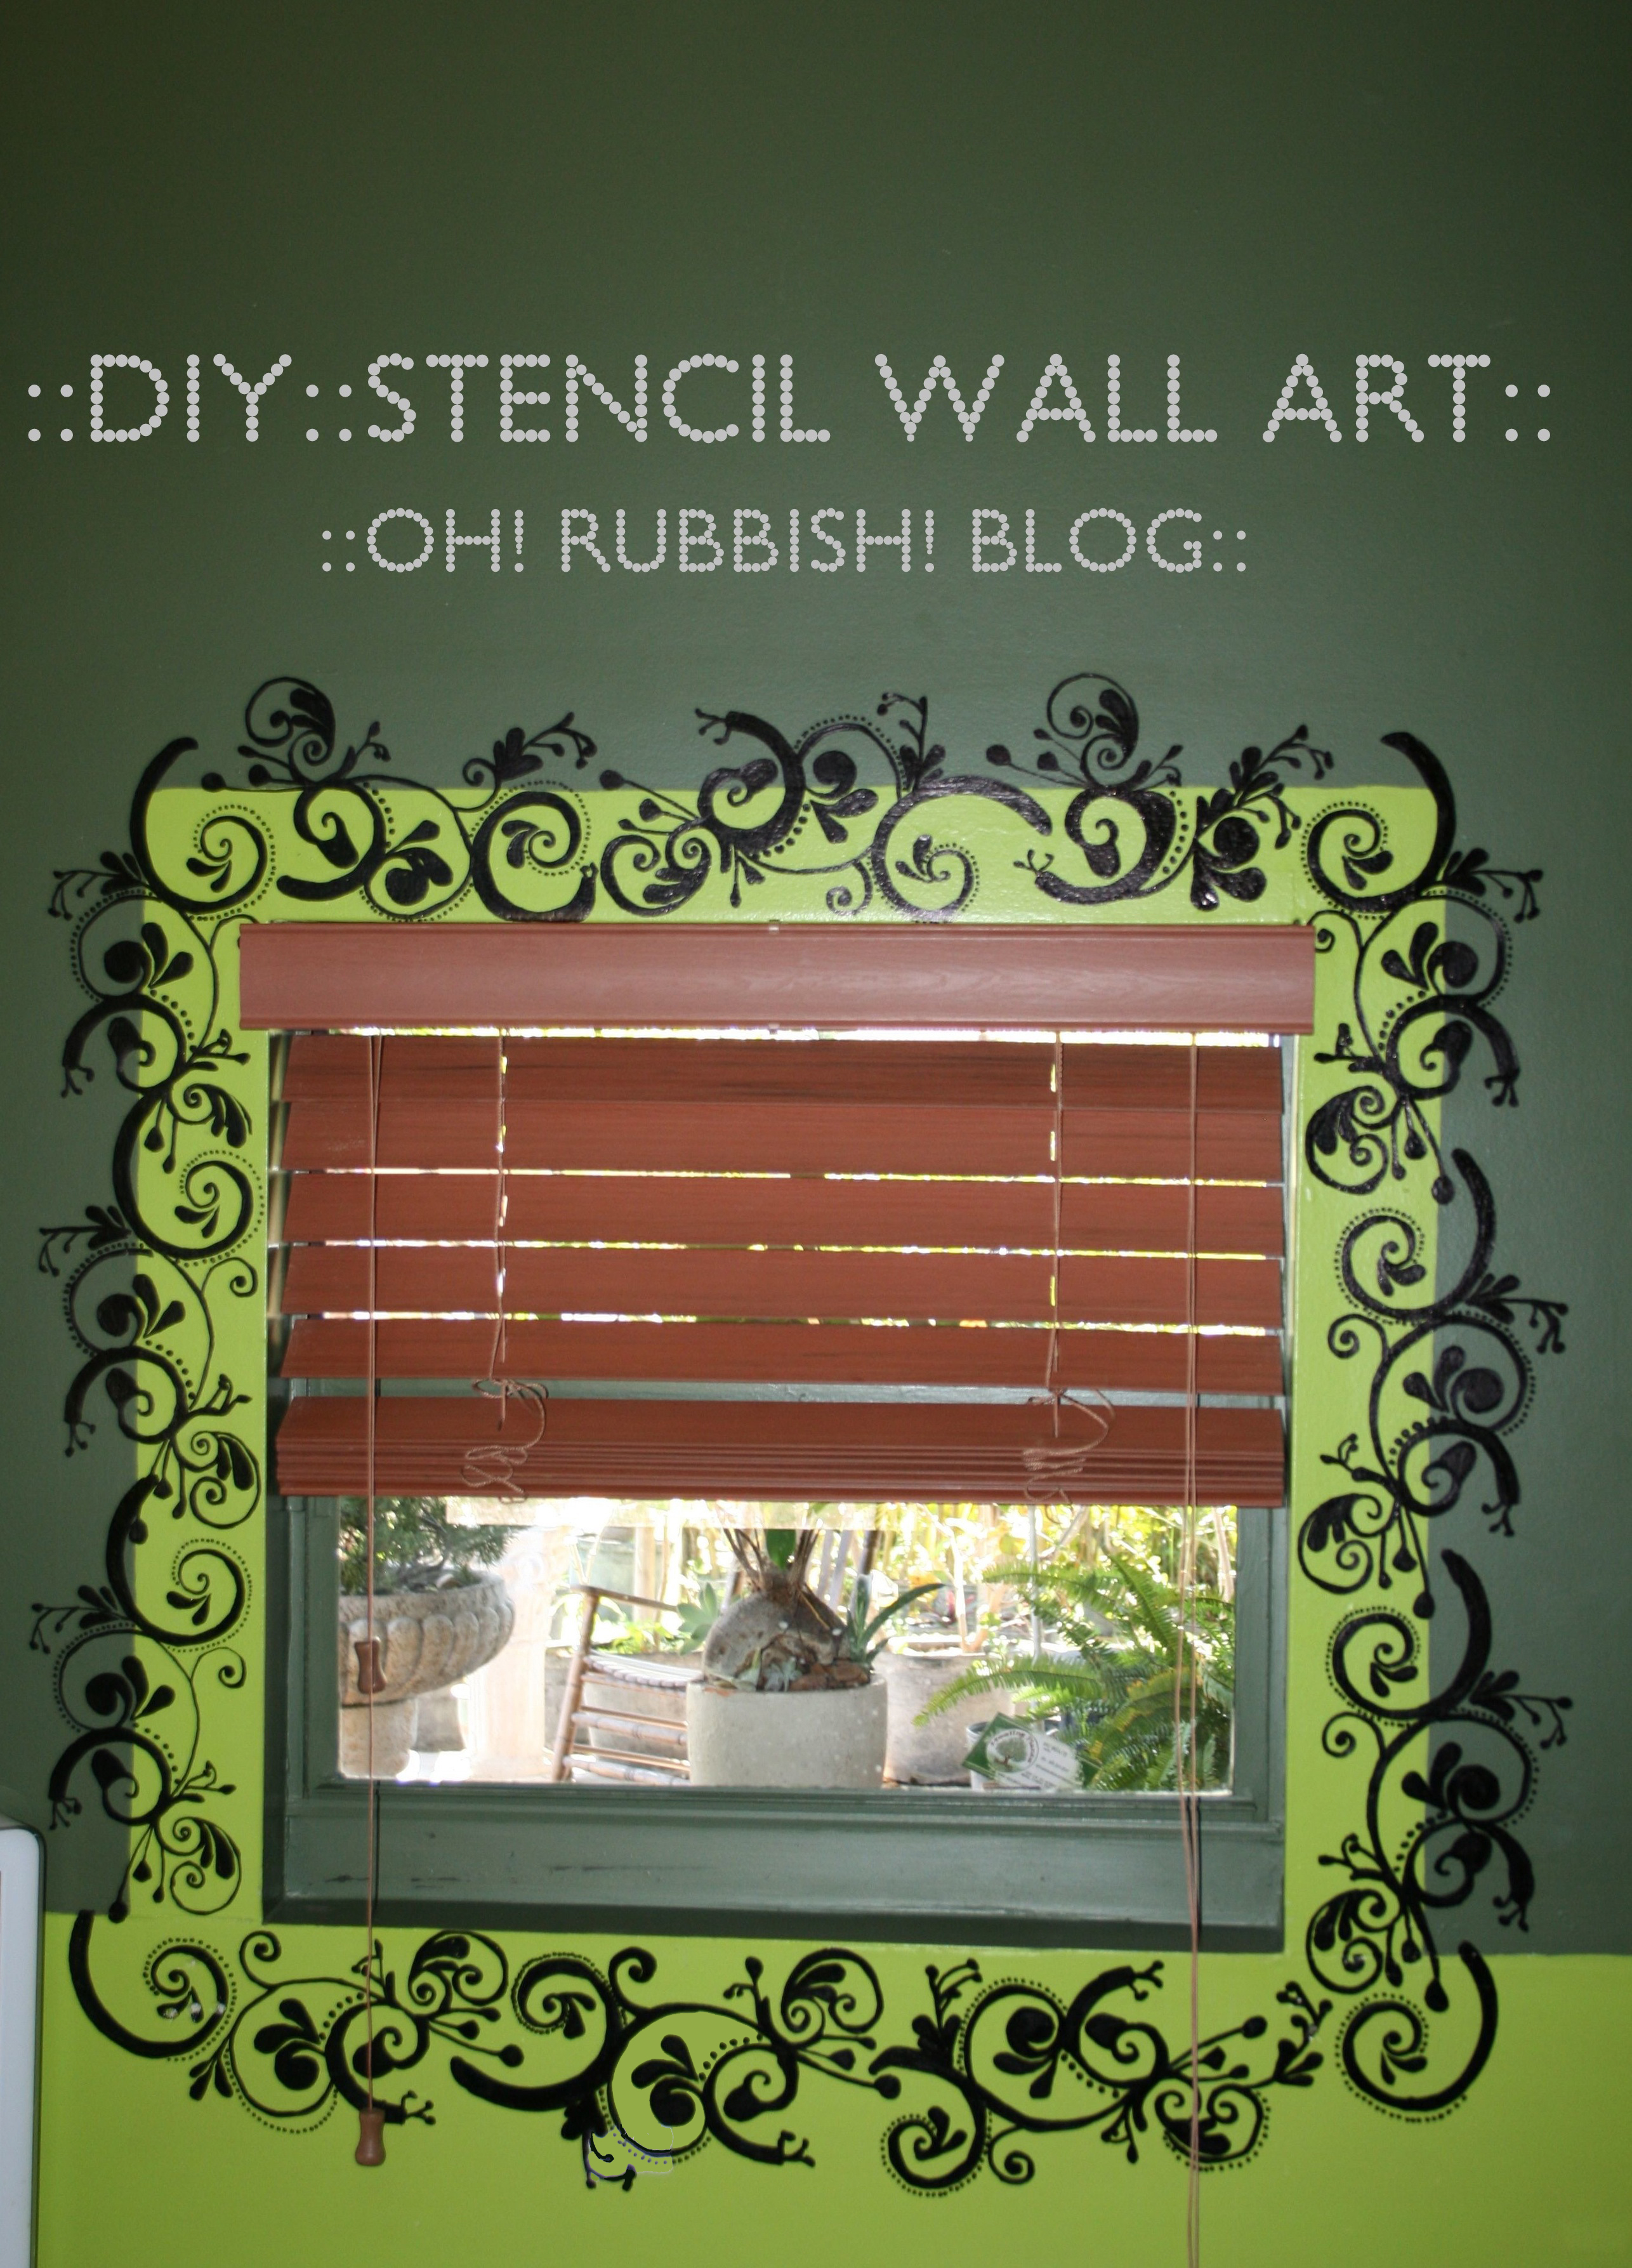
:: Wall Art for the Bedrooms :: Wall Window Decor ::
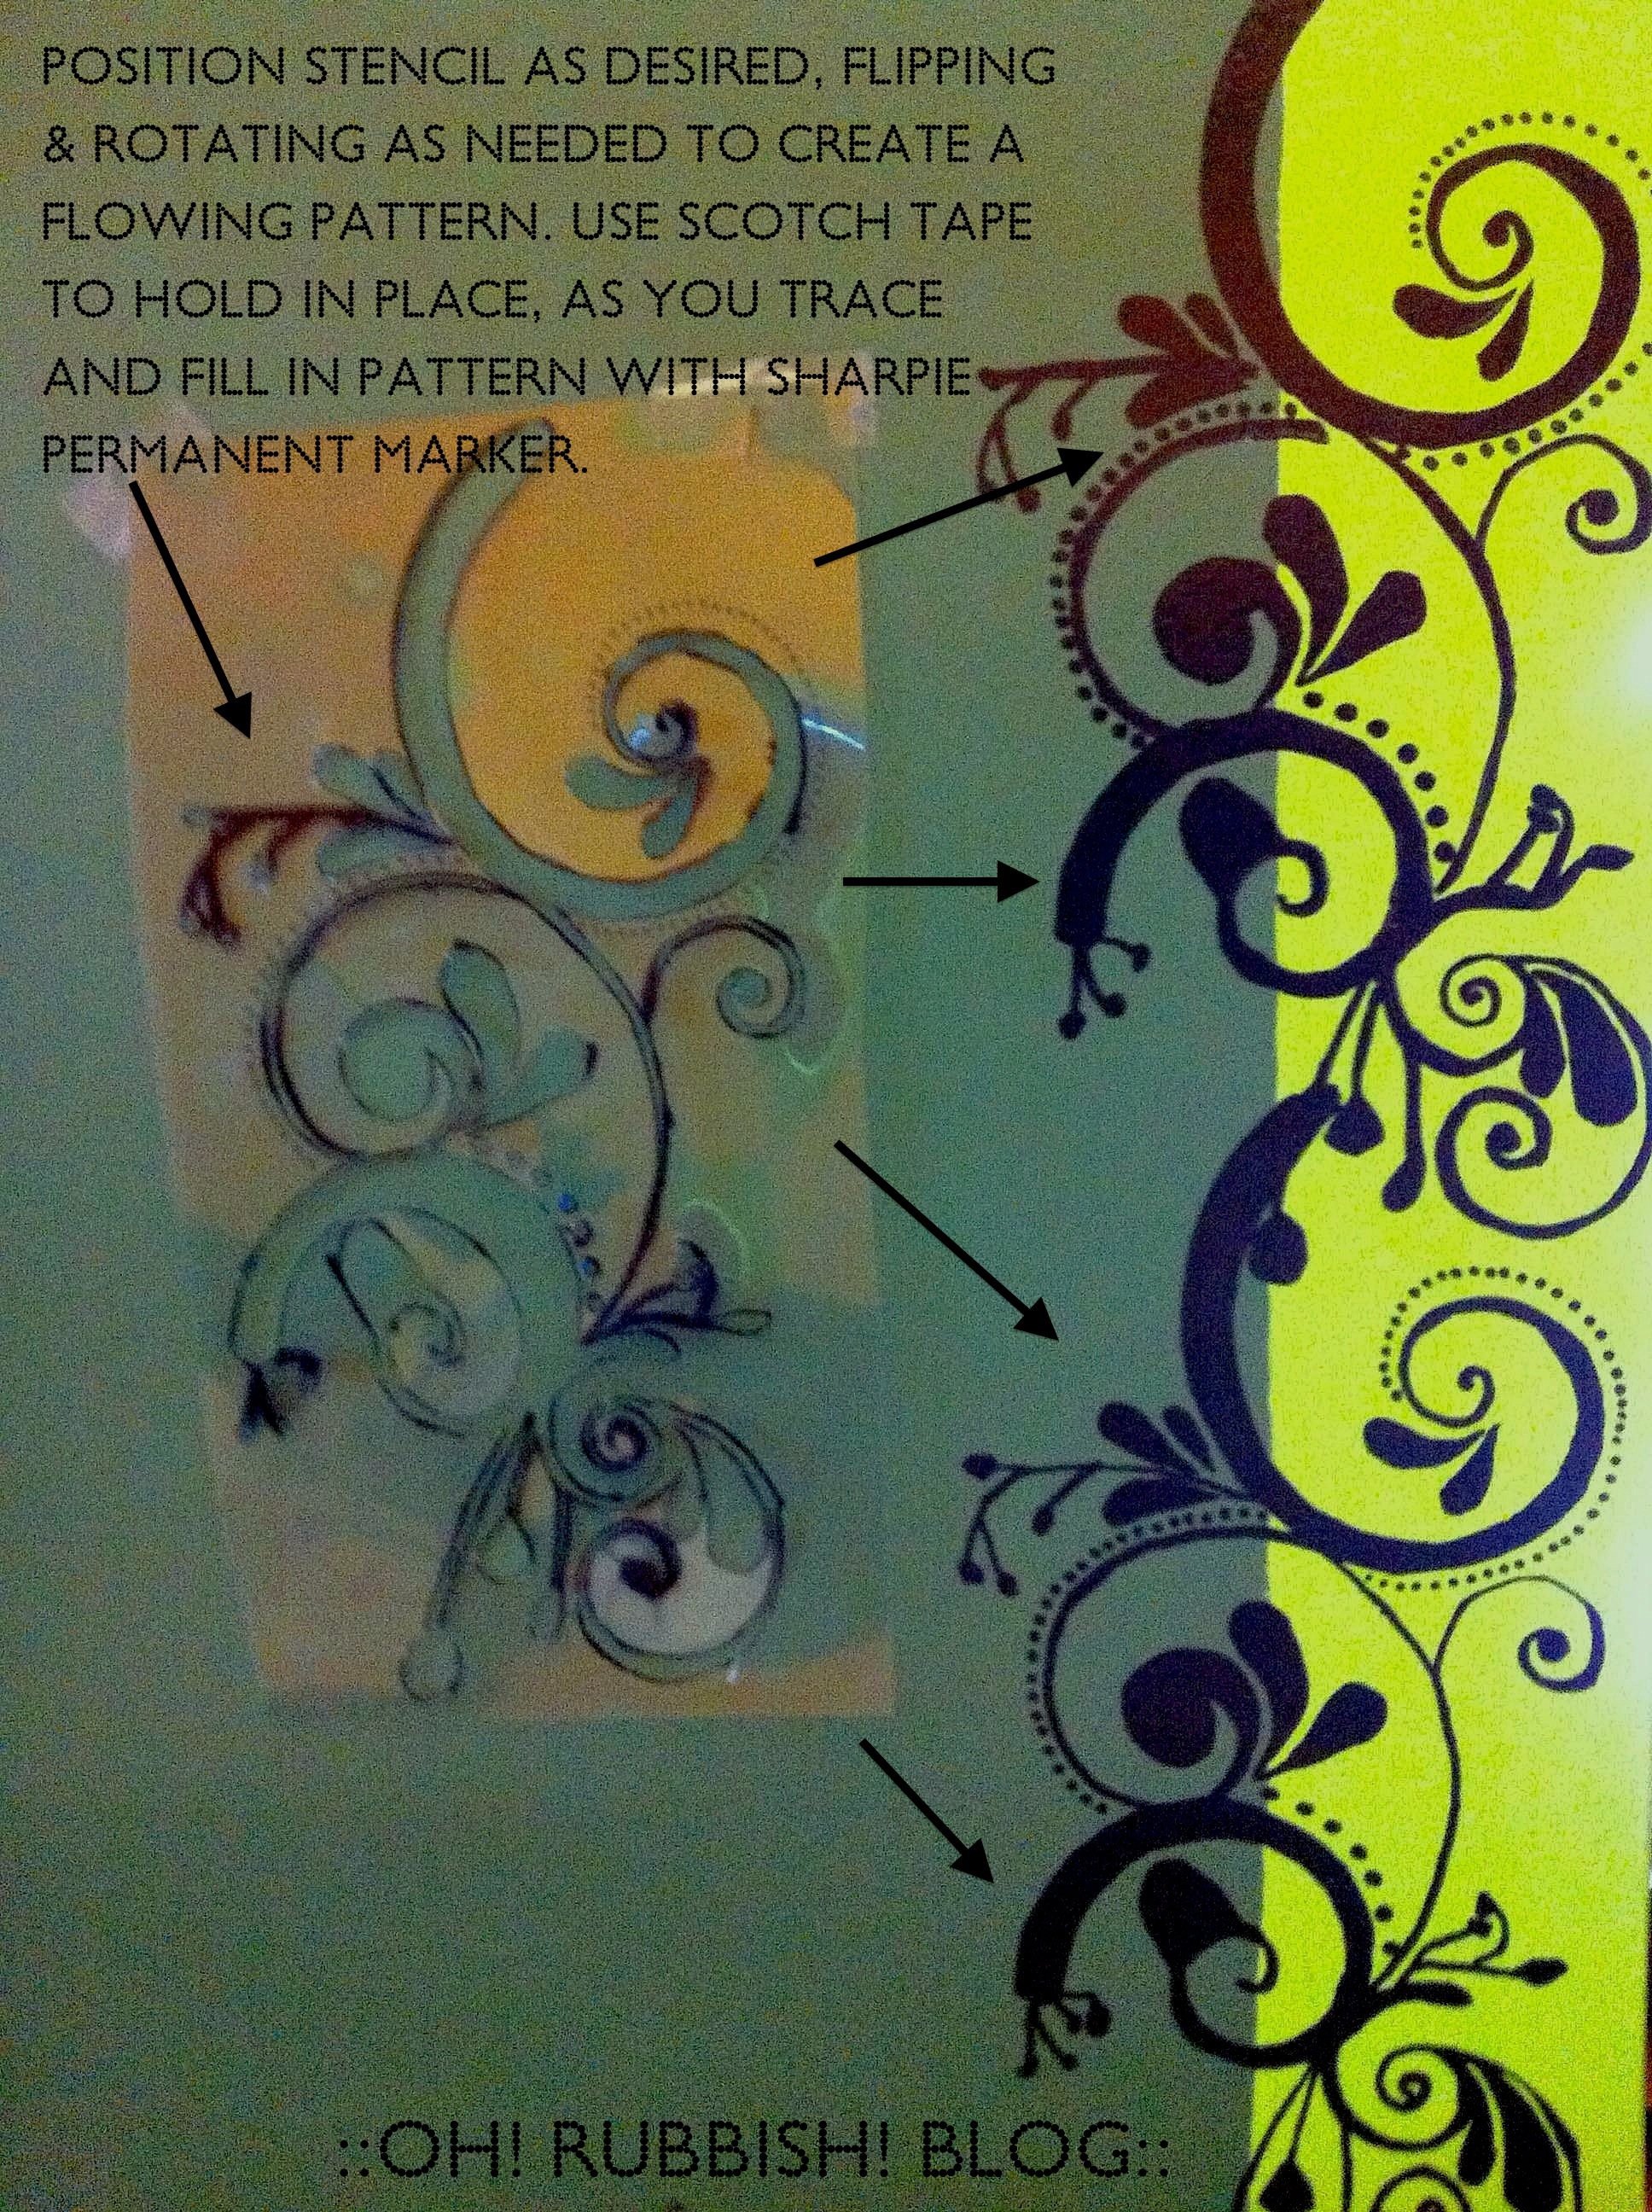
Position stencil as desired, flipping and rotating as needed to create a flowing pattern. Use tape to hold in place, as you trace and fill in pattern with permanent marker.
:: DIY Wall Art Stencils :: Wall Art for Windows ::
5 Replies to “:: DIY Stencil Wall Art :: Window Borders Designs ::”